Styling Guide: Tools, Tips & Tricks for Heat-Resistant Wigs

Whether you want sleek, straight strands, boho beach waves, or curls with major volume, a heat-resistant wig lets you create any hairstyle you can imagine. But styling the special heat-resistant fibers is a bit different than working with natural hair, so you’ll need to learn a few new techniques to achieve your dream ‘do. Read on for our comprehensive guide, which includes all the tools, tips, and tricks you’ll need to curl, straighten, and detangle heat-resistant wigs and hairpieces.
Step-by-Step Styling Prep
Step 1: Gather Your Styling Tools
The styling process is faster and easier when all your tools are already within reach. We recommend the following items for long-lasting results:
- Canvas Block Head & Clamp: Use a canvas block head to keep your wig secure while you create your style. To get started, attach your canvas block to a stand and anchor it to a table or counter. There are lots of options to fit your needs and budget, such as: Adjustable Professional Wig Clamp, Compact Economy Wig Clamp, or Suction Cup Stand.
- T-Pins: T-pins are flat pins that slide through your wig and into your canvas block to keep the wig from slipping while you style.. Shop T-Pins here.


- Wig Brush or Wig Comb: Use a wig-safe wide-tooth comb or wig brush to detangle your wig before you start styling. A comb can also be used to soften up curls near the end of the styling process.


Rene of Paris Wooden Wig Brush
- Wig-Safe Leave-In Conditioner: Treating your wig with a leave-in conditioner before styling moisturizes the hair for a silky-soft texture, aids in detangling, and offers heat protection.
- Wig Spray(Optional): Once your style is complete, a hairspray specially formulated for wigs provides extra hold.


- Hair Clips(Optional): Sectioning off the hair with clips before styling makes the curling or straightening process easier and gives more uniform results.
- Heat Styling Tools: Last but not least, gather any heated styling tools like curling irons, flat irons, and blow dryers. We recommend tools with a digital temperature display so you don’t expose your wig to excessive heat.
Step 2: Set the Right Temperature
Speaking of heat, keep in mind that your wig is heat-resistant, not invincible! Stick to temperatures no hotter than 280 degrees Fahrenheit when styling a heat-friendly wig, and use even lower heat settings when possible. This will keep your wig from being burned or damaged.
Step 3: Detangle
Prep your wig for styling by making sure it’s tangle-free. Gently detangle using a wide-tooth wig comb or wig brush.
Step 4: Condition & Protect
Spritz your wig with a wig-safe leave-in conditioner to moisturize the hair and create a protective barrier against heat. Apply conditioner ONLY to the ends and midsection of the hair; conditioning the roots and/or cap will loosen the hair from the wig cap and cause permanent damage. Comb your conditioner through the hair to ensure it's evenly distributed from mid-strand to ends. damage.
Step 5: Divide Evenly
This step is optional, but we find that it provides better control and makes the styling process more efficient. Divide the hair into equal sections using hair ties or clips. Now you’re ready to start styling!
Curling Techniques for Heat-Resistant wigs:
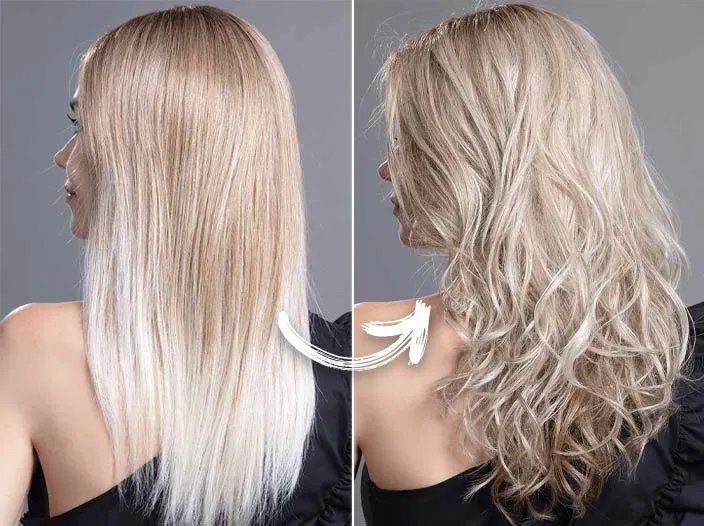
Method 1: Curling Iron Waves (Recommended)
Separate the hair into small sections and wrap each section around the curling iron, holding for about 10 seconds.
- Release the hair from the curling iron and pin the curl into place while it cools. You can also hold it in place with your fingers until cool.
- Repeat until the wig is fully curled. For a more relaxed, beachy look, run your fingers or a wide-tooth comb through the waves.
Tips for styling your wig with a curling iron
- For looser curls with a less defined, more wavy look, separate out larger sections of hair and/or use a curling wand with a larger barrel.
- For tighter curls with more definition, use narrower sections of hair and/or a curling wand with a smaller barrel.
- Avoid damage by holding the hair to the curling iron for a maximum of 15 seconds; 10 seconds is ideal.
Method 2: Blow Dry with Rollers
Use this technique for a salon-style blowout with bouncy curls and lots of volume.
- Wrap small sections of hair around foam or fabric rollers and secure.
- Spritz with water using a spray bottle until the hair is slightly damp.
- With the rollers in place, use a low-heat blow dryer with a diffuser attachment to dry the wig and set the curls. The diffuser protects against frizz for a smooth and long-lasting style.
- Let the hair cool completely, then remove the rollers to release perfectly shaped curls.
Straightening Techniques for Heat Resistant Wigs:

Use a flat iron to achieve a sleek, straight, and shiny look.
- Set your straightener’s temperature no higher than 280°F.
- Use a smooth, even motion to glide the flat iron over small sections of hair. Smaller sections create a smoother result.
- Once all the sections are straightened, let the hair cool completely for a flawless finish.
Tips for styling your wig with a flat iron:
- Start straightening at least an inch from the root. If you start too close, you risk loosening the hair or burning the wig cap.
- Don't hold the iron still on a single section of hair for too long; this can damage the fibers.
Removing Kinking or Matting from Heat-Resistant Wigs
Because heat-resistant fibers react to friction more than standard synthetic hair, your wig may be prone to kinks, matting, or tangles. Good news: these issues can be resolved with heat styling techniques.
Flat Iron Method
Detangle the wig as described above and gently glide a flat iron on low heat through the hair until smooth.
Steam Revival
Use a portable steamer on your wig, directing the steam towards areas with kinks or matting. Hold the steamer at least a foot away from the hair so it doesn't get burned.
Warm Water Soak
Carefully soak the hair of the wig in a basin of warm water mixed with a small amount of wig conditioner. Submerge the hair only; do not let the roots or wig cap come into contact with the conditioner. Rinse and let the wig air dry on a wig stand.
When it comes to styling your heat-resistant wigs, practice makes perfect! You’ll want to try out different tools and techniques until you find the style that works best for you. Have a favorite look? Share your advice for styling heat-friendly wigs in the comments below!
